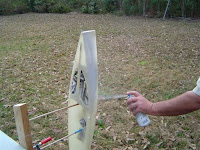
Oh yeah, my choice of color? "Porn Star Pink" - the the link below to the website of auto air colors. These paints go on easy, but are water based so a clear is required to protect the paint job. If I had goofed, it would have been relatively easy to wash the old paint off and start over. This paint can not be sanded between coats or after a coat prior to clear coating.
Sunday, February 15, 2009
Hull painted
Here are some photos of the final paint job on the hull. When the weather presents a good day for outside spraying I will put some automotive clear coat on the hull to protect the paint. Being water based paint, it is pretty fragile at the moment. After the clear coat goes on I can then paint the cockpit and the deck. I still have much to do on the boat, but very happy to have some paint on her. I need to drill a hole for the rudder tube, drill a hole for the keel bolt as well as drilling holes for various fairleads and a deck block. I have to make my rigs and sails and then work on connecting the lead bulb to the keel. The keel and the rudder also need to be painted. WOW! I have a lot of work remaining on the boat, but so far it has been a very satisfying project. I need to thank Al, Hew and Dave for all of their help, advice, assistance so far in this project. THANKS GUYS!
Oh yeah, my choice of color? "Porn Star Pink" - the the link below to the website of auto air colors. These paints go on easy, but are water based so a clear is required to protect the paint job. If I had goofed, it would have been relatively easy to wash the old paint off and start over. This paint can not be sanded between coats or after a coat prior to clear coating.
Color on the hull
Here is the 1st coat of the color paint on the hull. It is a 'sparklescent' color from autoaircolors.com. It is supposed to sparkle when the sun hits it. Prior to painting the color on the hull, Hew suggested we sand down the 'tape line' from when we taped the hull to reference the blue paint. Hew took some 380 grit wet sand paper and v e r y lightly he sanded this small ridge down. After talking with Dave today, he said looking back at it, we never should have laid the tape down. It may have been better to just paint the whole hull blue, then taped off the stripe, then spray the white. This would have eliminated the lip of paint from the tape and would have maybe helped the white lay down more even. It took many coats of the white to cover where the blue and the gray primer met. Arm chair quarterbacking? Naw, just a lesson for next time using these paints.
Covering up the white bottom and blue boot stripe
Here is Hew and Al helping me to cover the white bottom and the blue boot stripe. We would have used regular newspaper, but Al learned from experience that the ink in the newsprint will bleed over to the white paint and ruin the white paint. Luckily he had some blank blueprint type paper that we used to cover the white hull.
White paint on the hull
Here I am with a blow dryer blowing some hot air on the fresh paint. The paint I am using is water based, so the coats can go down pretty quickly, one after another. It is a good idea to dry the paint before putting on the next coat, so the blow dryer was used to speed the drying process up a little. After many coats I finally got the results i was looking for.
Blue Boot Stripe - II
Here you can see the yellow tape we laid on the hull near the waterline. This will be the blue boot stripe. It was difficult to get the tape to lay down with a nice curve and remain on the water line. We took a laser level and set it up on a bench across from the hull and we then 'leveled' the boat so the line hit the bow at the water line and at the stern at the waterline, or maybe it would be better to say where the design water line is supposed to be. Anyway, with the room dark, so the laser beam was more visible I used small tabs of blue painters tape and marked the laser line every couple of inches or so. The lights were then turned back on and Dave helped me to lay this yellow tape so one edge hits these small bits if blue tape used to mark the line. After a few 'do-overs' we get the line to look right, with no obvious sharp curves or bends. We then did the same procedure for the other side. After both sides were done we then looked at both sides together to see how they looked. It looked fined and I then proceeded with the white paint.
Blue Boot Stripe
I decided to make the paint scheme a bit difficult for the 1st time painter (me). Al and Dave helped me to figure out how to do this. I put on some painters tape on the hull in an area where was we did not want to continue with the blue stripe paint, as a reference line. I sprayed the hull from one side of the painters tape to the other side, completely covering the bottom of the hull in blue.
Hull faired, primed and ready for final paint!
Well, I spent some time on Friday sanding down some Bondo and filling some dings and dents in the hull, trying to get it ready for final paint. Saturday I took the hull by Hew's shop for his 'once-over'. Hew helped me fill in a few more low spots on the cockpit and helped me touch up a few areas on the bow. Finally the hull is ready for paint!
Friday, February 13, 2009
Thursday - February 12th update
Thursday I purchased my paint for the boat – I went with the AUTO AIR COLORS (autoaircolors.com). This is the brand that Hew and some of the others used to paint their boats.
I sanded the epoxy that oozed out of the hull deck joint last night and put a coat of primer on the hull and the rudder. I then put some more filler in some of the chips and while sanding the hull deck joint on the port bow section I noted a good size hollow that needed to be filled. I mixed up some Bondo and smeared it on this area after sanding the primer off and exposing the fiberglass. Unfortunately when I mixed the Bondo I did not add enough hardener and the end result after about an hour was still unset. I scraped this Bondo off and cleaned up the hull with some acetone to remove the remaining film of unset Bondo. I added some more hardener to the Bondo and re-smeared in on the hull. This time the Bondo set too soon and I did not get a good finish. Looks like more sanding for me and probably some more filling to fix this botch. Needless to say I am not too happy with my boat building skills the past week. Hopefully things will turn around and I can get the hull smooth and ready for final paint before I head out of town again.
After I get her painted I will drill the holes for my sheets rudder tube and keel bolt. I will also install the fairleads on deck for the jib sheets, another turning block on deck.
I also will be making sails; I have watched Al make quite a few sails the past few years, both Victoria sails and IOM sails. I am sure it is not an easy thing to do, but watching Al, he makes it looks pretty simple.
Wednesday, February 11, 2009
Fixed the Hull/Deck Joint
Today I went by Hew's shop and he helped me to fix the hull/deck joint. We pulled the deck off from the hull from the chain plates forward, working a razor blade to open it up all the way. We then took some sandpaper and roughed up both edges to be reconnected. Hew then mixed up some 30 minute epoxy and he carefully put it in the joint. We then taped the deck down to the hull and let it sit. Hew also took some bondo and filled and faired a spot on each side of the hull.
I then went over to the boat yard @ Al's and I cut some fiberglass cloth to lay up under the chain plates to connect the hull to the deck in this area. I mixed up some epoxy and put some in a syringe to use later with the cloth. The balance of the epoxy was mixed with some adhesive filler and made paste like. I put this thickened epoxy inside the hull mashing it to the deck under the chain plates. I then cut the cut fiberglass cloth and tabbed the deck to the hull. After the cloth was in place I then took the syringe of regular epoxy and squirted it on the cloth. Taking my finger and a plastic straw I wetted the cloth and then set the boat upside down to dry.
I also made a table top boat stand to hold the boat while working on a table or the tailgate of a truck. It will hold the boat with out rudder or keel.
Should be buying paint tomorrow and hope to get her painted up over the weekend.
Tuesday, February 10, 2009
Set Back
I had a small set back on the Vektor this afternoon. Seems when I was sanding the primer/filler and handling the boat the deck came adrift from the hull in the area from the shroud attachment point forward for about 3 inches (to the center of the access hole).
Luckily Al was there to stop me from tossing the whole thing in the trash and he suggested I put some Z epoxy thickened with some adhesive filler into the opened seam. I did this and then taped it down. Will check on it tomorrow morning. Al then asked if I had tied the hull together with the deck in the area of the shrouds with glass, to which I did not! So, tomorrow I will cut some fiberglass cloth to tie the areas together and mix up some thickened epoxy to put in this area, with boat on her side so let gravity do its job. The after this thickened stuff is in place I will come back and tab the hull to the deck with the fiberglass cloth and some regular epoxy.
And to think I was getting ready to buy my paint and thought that I may even be able to paint her this weekend.
Luckily Al was there to stop me from tossing the whole thing in the trash and he suggested I put some Z epoxy thickened with some adhesive filler into the opened seam. I did this and then taped it down. Will check on it tomorrow morning. Al then asked if I had tied the hull together with the deck in the area of the shrouds with glass, to which I did not! So, tomorrow I will cut some fiberglass cloth to tie the areas together and mix up some thickened epoxy to put in this area, with boat on her side so let gravity do its job. The after this thickened stuff is in place I will come back and tab the hull to the deck with the fiberglass cloth and some regular epoxy.
And to think I was getting ready to buy my paint and thought that I may even be able to paint her this weekend.
Sunday, February 8, 2009
Saturday, February 7, 2009
Back in the barn for the night
I put the primed hull back in the barn for the night. Tomorrow i will sand the high spots down and prime again. I will also take some filler to fill in the pin holes and some dents that are visible with the coat of primer. I need to go by and pick out the color of my hull soon. After i get some more priming/sanding done i will then drill holes for the fairleads and another turning block. I have a lot of work left in installing lead bulb to the keel, making rigs, building sails, working on the rudder and making a boat sand out of PVC piping. It seems the stuff the requires thought and more thought are still ahead of me. So far this project has been very satisfying and i could not have done it with out the help of Al and Hew.
Mast ram
Rudder
The rudder was laid up in the mold again, and some wetted fiberglass cloth was twisted up to stiffen the rudder. Some epoxy mixed with adhesive was made thick and with a syringe was squirted along the edges. The molds were then stuck together and clamped tight. I will see how the rudder turns out tomorrow ABOVE - rudder post (stainless steel rod, bent to better hold in the rudder) affixed to half of the molded rudder.
BELOW - you can bearly see the twisted wetted fiberglass cloth that will add stiffness to the rudder.
Main sheet post
Above shows the main sheet tube attached to the hull, the rudder servo mount is directly aft of the post.
Below shows the main sheet post where it protrudes through the deck. Eventually it will be cut down some, but for now i am keeping it at this length. The epoxy around the edges was sanded smooth.
Mast tube - cut off and sanded down
Here is the mast tube after the epoxy hardened. The exposed piece will be cut off with the cutting wheel of the dremel and the the tube sanded flush and smooth to the deck.
The picture above shows the base of the mast tube, affixed to the hull.
Below shows the tube after it was cut above the cockpit and sanded a bit.
The photo below shows the mast tube sanded flush with the deck.
The picture above shows the base of the mast tube, affixed to the hull.
Below shows the tube after it was cut above the cockpit and sanded a bit.
The photo below shows the mast tube sanded flush with the deck.
Friday, February 6, 2009
Rudder
I am going to use the mold that Al made for a rudder.
Here i am cutting out some scraps of fiberglass cloth that I will use for the rudder.
I put some mold release on the molds and after it dried i laid down a layer of the fiberglass cloth and wetted it out. I put three layers of cloth on each side of the rudder mold.
Tomorrow i will pull these rudder halves out of the mold sand /cut the edges and then put a stainless steel post on one side for the rudder post. Some epoxy will be mixed up and then the 2 halves will be epoxied together. The rudder should come out faired with minimal amount of work required to have it ready for use.
Installing mast tube, sheet post
Today I took the tape holding the deck to the hull off and sanded the edges down to make a smooth hull/deck joint. I still have more sanding to do.
I then cut the holes for the mast tube, main sheet post and the battery/receiver pot. Hew came by to supervise and took these photos. After cutting the deck to hold these items I then mixed up some epoxy thickened with adhesive filler and filled the gaps between the deck and the mast tube and main sheet post. I also put some of this epoxy mix to secure the base of the mast tube and main sheet post to the hull. This will cure overnight.
Next I will cut the protruding mast tube to deck level and sand smooth and trim off some of the main sheet post.
Wednesday, February 4, 2009
Deck attached to the Hull
Finally got the deck attached to the hull tonight. I need to thank Hew for his willingness to stick his fingers in gooey epoxy (thickened with adhesive filler) and do the dirty work. I think it drives him nuts that my epoxy work could be considered sloppy by some and I am sure he felt better knowing the epoxy was put on right and with out too much seepage. We also installed and epoxied into place the tube that holds the mast ram. While the deck was still off i secured a block to the forward bulkhead that the sheets will turn on.
In the photo Dave is doing his inspection work on this step. Dave has all ready completed his Vektor and has also been a great source of help and guidance for me. Seriously though, i could not have gotten this far with out the help and guidance of my good friend Al and his awesome boat yard located in a top secret location in his attic. I also need to thank Hew for his answering my questions and offering his advice.
Well, still have lots of work to go - fit the lead bulb to the keel blade, build a rudder, build rigs and then make sails. I want to believe it is downhill from here, but somehow i think i am getting to the complicated stuff now.
Stay Tuned!
Oh yeah - credit for this photo to Hew, photo taken with his iPhone
UPDATE - February 4, 2009
Checked the hull for leaks last night and found a leak @ the top of the keel truck where it meets the small flat piece put in top of the keel trunk. This will be fixed with some thickened epoxy.
The deck was not installed last night as the epoxy used the previous night to secure the nuts on the underside of the deck and the rudder plug did not harden sufficiently. I guess mixing small batches of epoxy is not a good thing to do, as the mix was probably not to the proper ratio. Hopefully it is hard today and we can connect the deck to the hull this evening.
In the mean time, I drilled holes for the servo mounting screws and then watched Al make a few jibs for his 'A' rig for his KITE. I can say that I am looking forward to making sails, although Al makes it look easy, I am sure it is harder than it looks.
Monday, February 2, 2009
Rudder post plug
We poured some epoxy into a small canister last week. This plug will be secured to the hull and to the deck when the deck is epoxied in place. The hole will be drilled through the hull, rudder plug and deck for the rudder tube to be fitted. This will give some added strength and hopefully minimize any water ingress into the hull from this hole in the boat.
Underside of deck
Some epoxy thickened with adhesive filler was mixed up and then, very carefully with a toothpick, was placed around the washers and nuts of the shroud attachments, back stay attachment and for the turning block. Having the nuts epoxied in place will mean that i can safely take of the deck hardware when it comes time to paint with out having to worry about getting my chubby hands inside these inaccessible places once the deck is secured to the hull.
Shroud, Backstay and Turning Block Attachment Points
Shaping the Transom
Subscribe to:
Posts (Atom)
Blog Archive
-
▼
2009
(123)
-
▼
February
(42)
- Hull painted
- Color on the hull
- Covering up the white bottom and blue boot stripe
- White paint on the hull
- Blue Boot Stripe - II
- Blue Boot Stripe
- Hull faired, primed and ready for final paint!
- Hull pictures
- Thursday - February 12th update
- Fixed the Hull/Deck Joint
- Set Back
- RUDDER
- Back in the barn for the night
- Primed Hull
- Getting ready to prime the hull!
- Mast ram
- Booms
- Rudder
- Rudder servo
- Main sheet post
- Mast tube - cut off and sanded down
- Rudder
- Installing mast tube, sheet post
- Deck attached to the Hull
- UPDATE - February 4, 2009
- Rudder post plug
- Underside of deck
- Shroud, Backstay and Turning Block Attachment Points
- Shaping the Transom
- Inside of the hull
- Attaching structures to the hull
- Transom
- Base for Mast Tube and Sheet Post
- Rudder Servo Bracket
- Sail Servo Bracket
- Keel box stiffeners/frames
- Cutting keel box
- Keel box / Hull joint
- Removal of Keel from Keelbox/Hull
- Forward Frame
- Sail Servo Bracket
- Foredeck Stiffener
-
▼
February
(42)